DEVLOG 8
This week was all about bridging the gap between high-fidelity materials and actual gameplay logic. Now that the core assets are modeled, I focused on making the environment "smart" through shader work and preparing the scene for a walkthrough.
1. Material Pipeline
I spent a significant amount of time refining the material library to ensure the scene hits that AAA visual target.
- The Tiling Library: I created three new core tileables: Sand, Tarp, and Paper. These utilize the Bake-to-Plane method I mastered earlier, and mentioned in Devlog 6 & 7
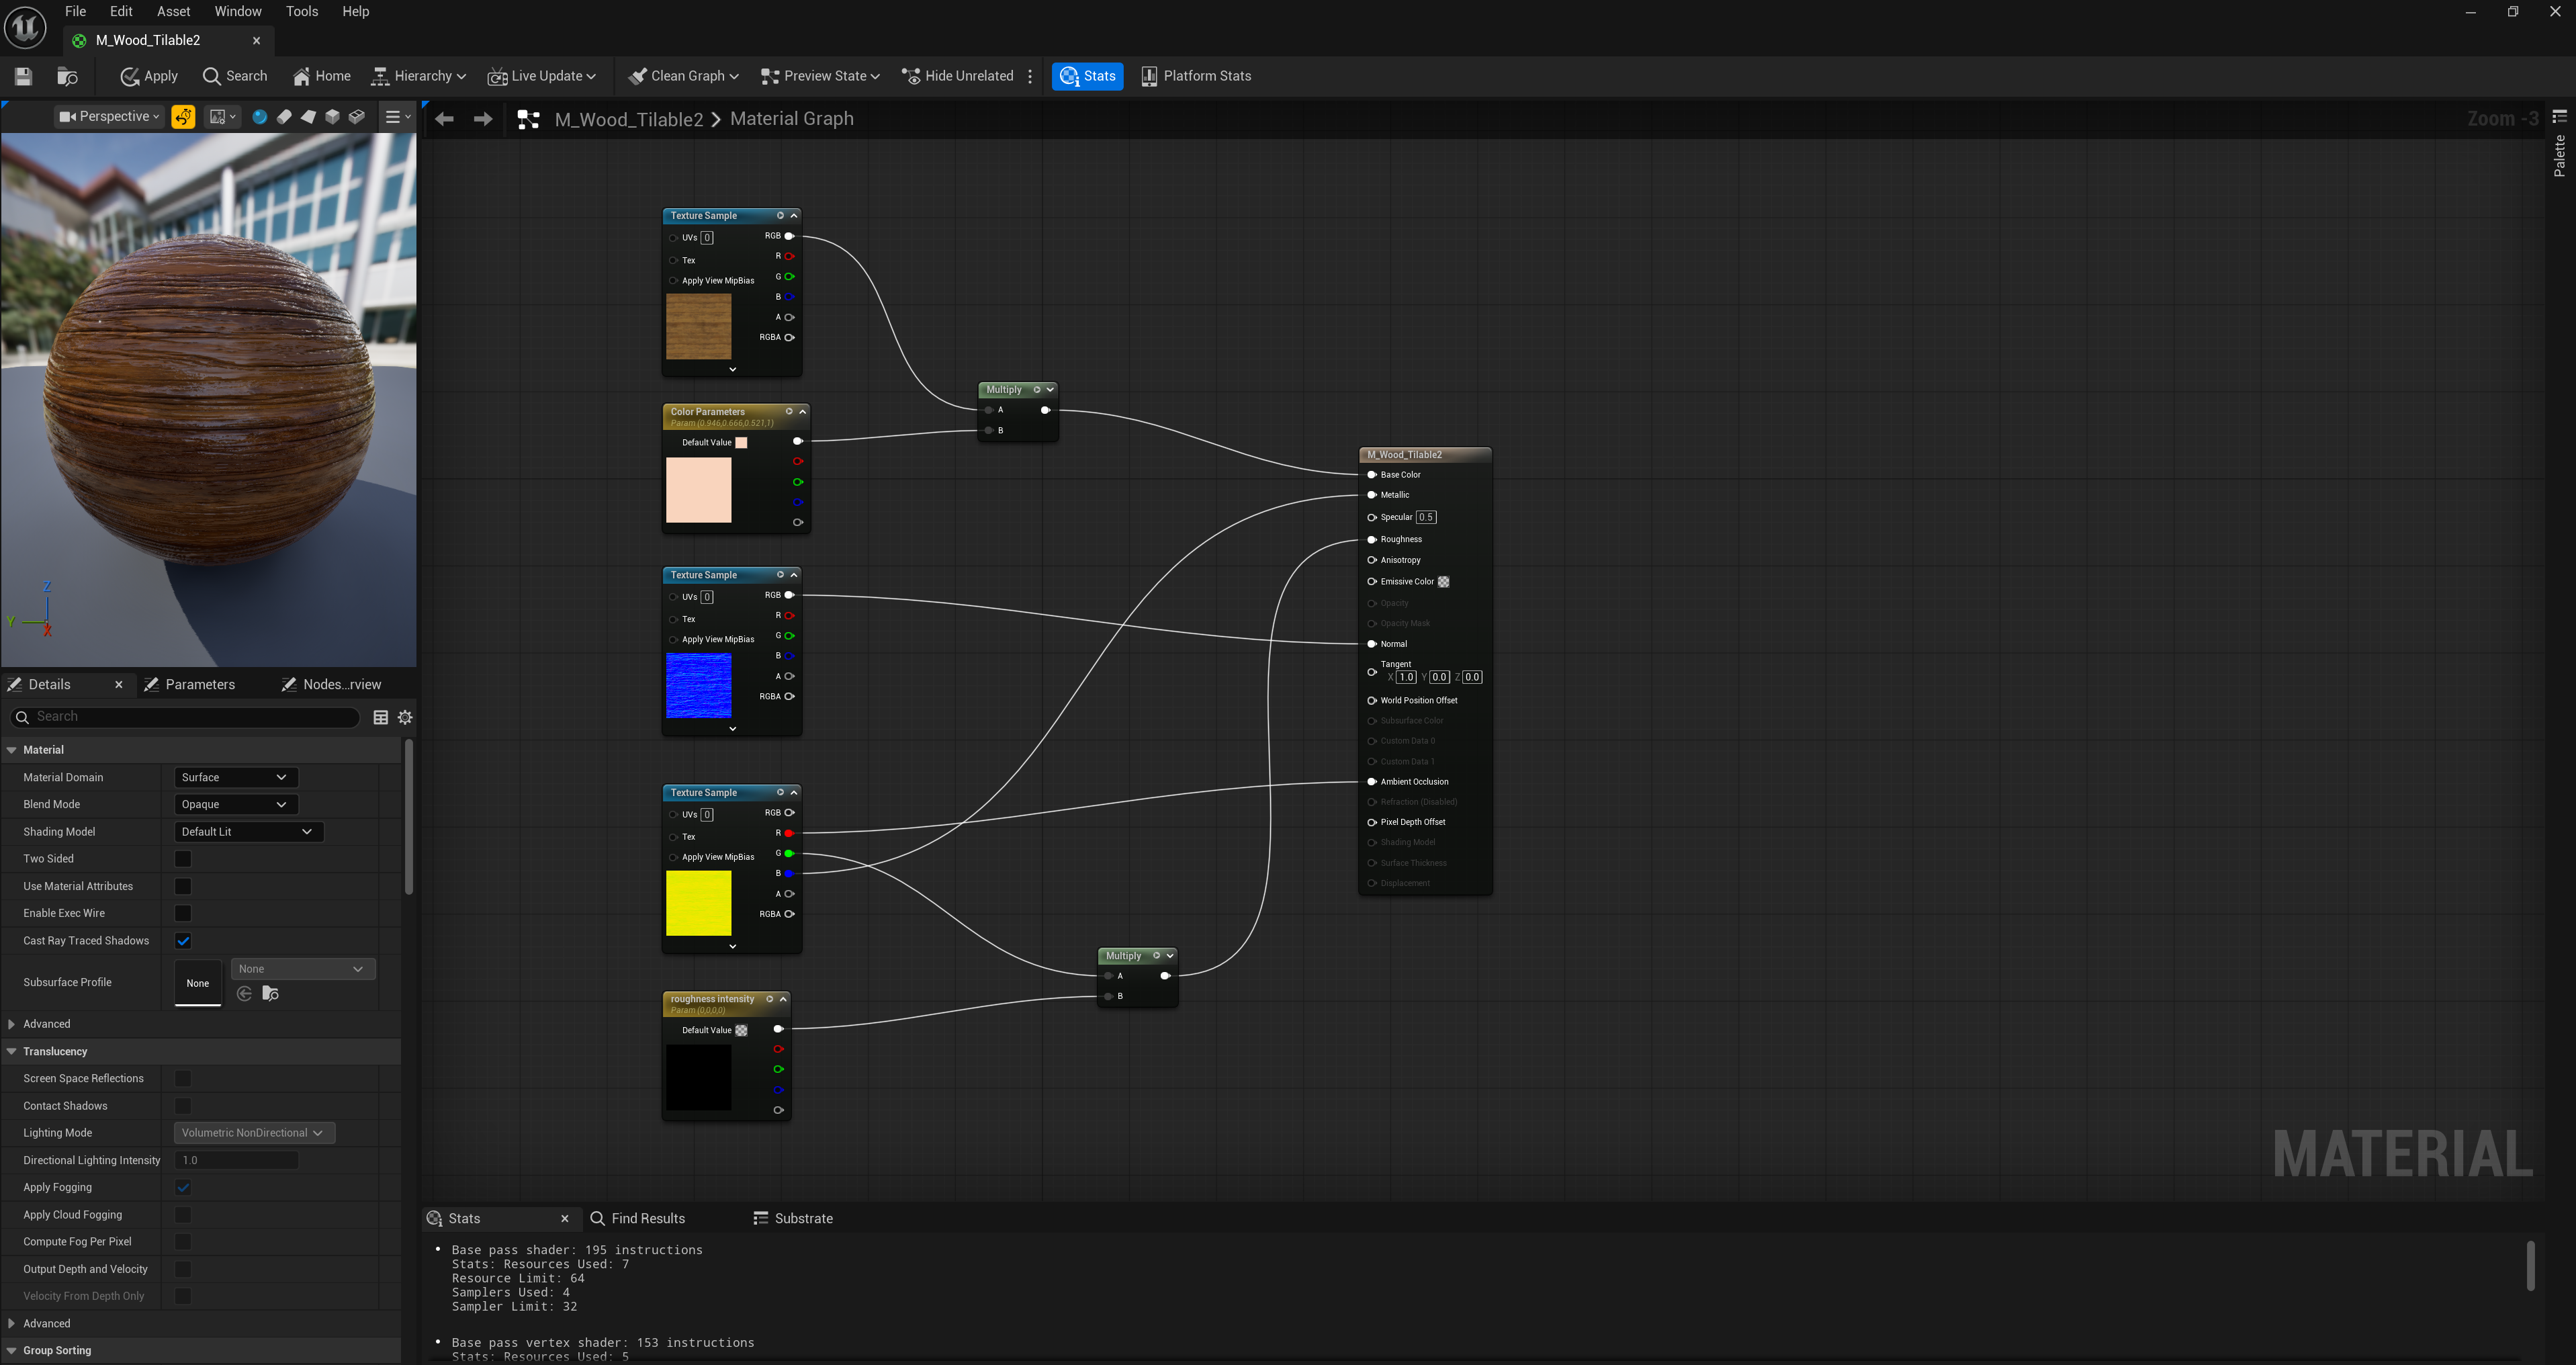
- Detail Normal Blending: I implemented the Detail Normal Blend method for the wooden planks. This allows me to keep the unique macro dents and coloring of the wood while overlaying a high-frequency grain on top.
- Dynamic Wetness & Color: I updated the wooden plank shader to include a Wetness Mask and Color Tinting parameters. I can now dial in exactly how damp the wood looks near the cave entrance and adjust the wood tones to ensure the desk and floorboards feel part of the same visual family.
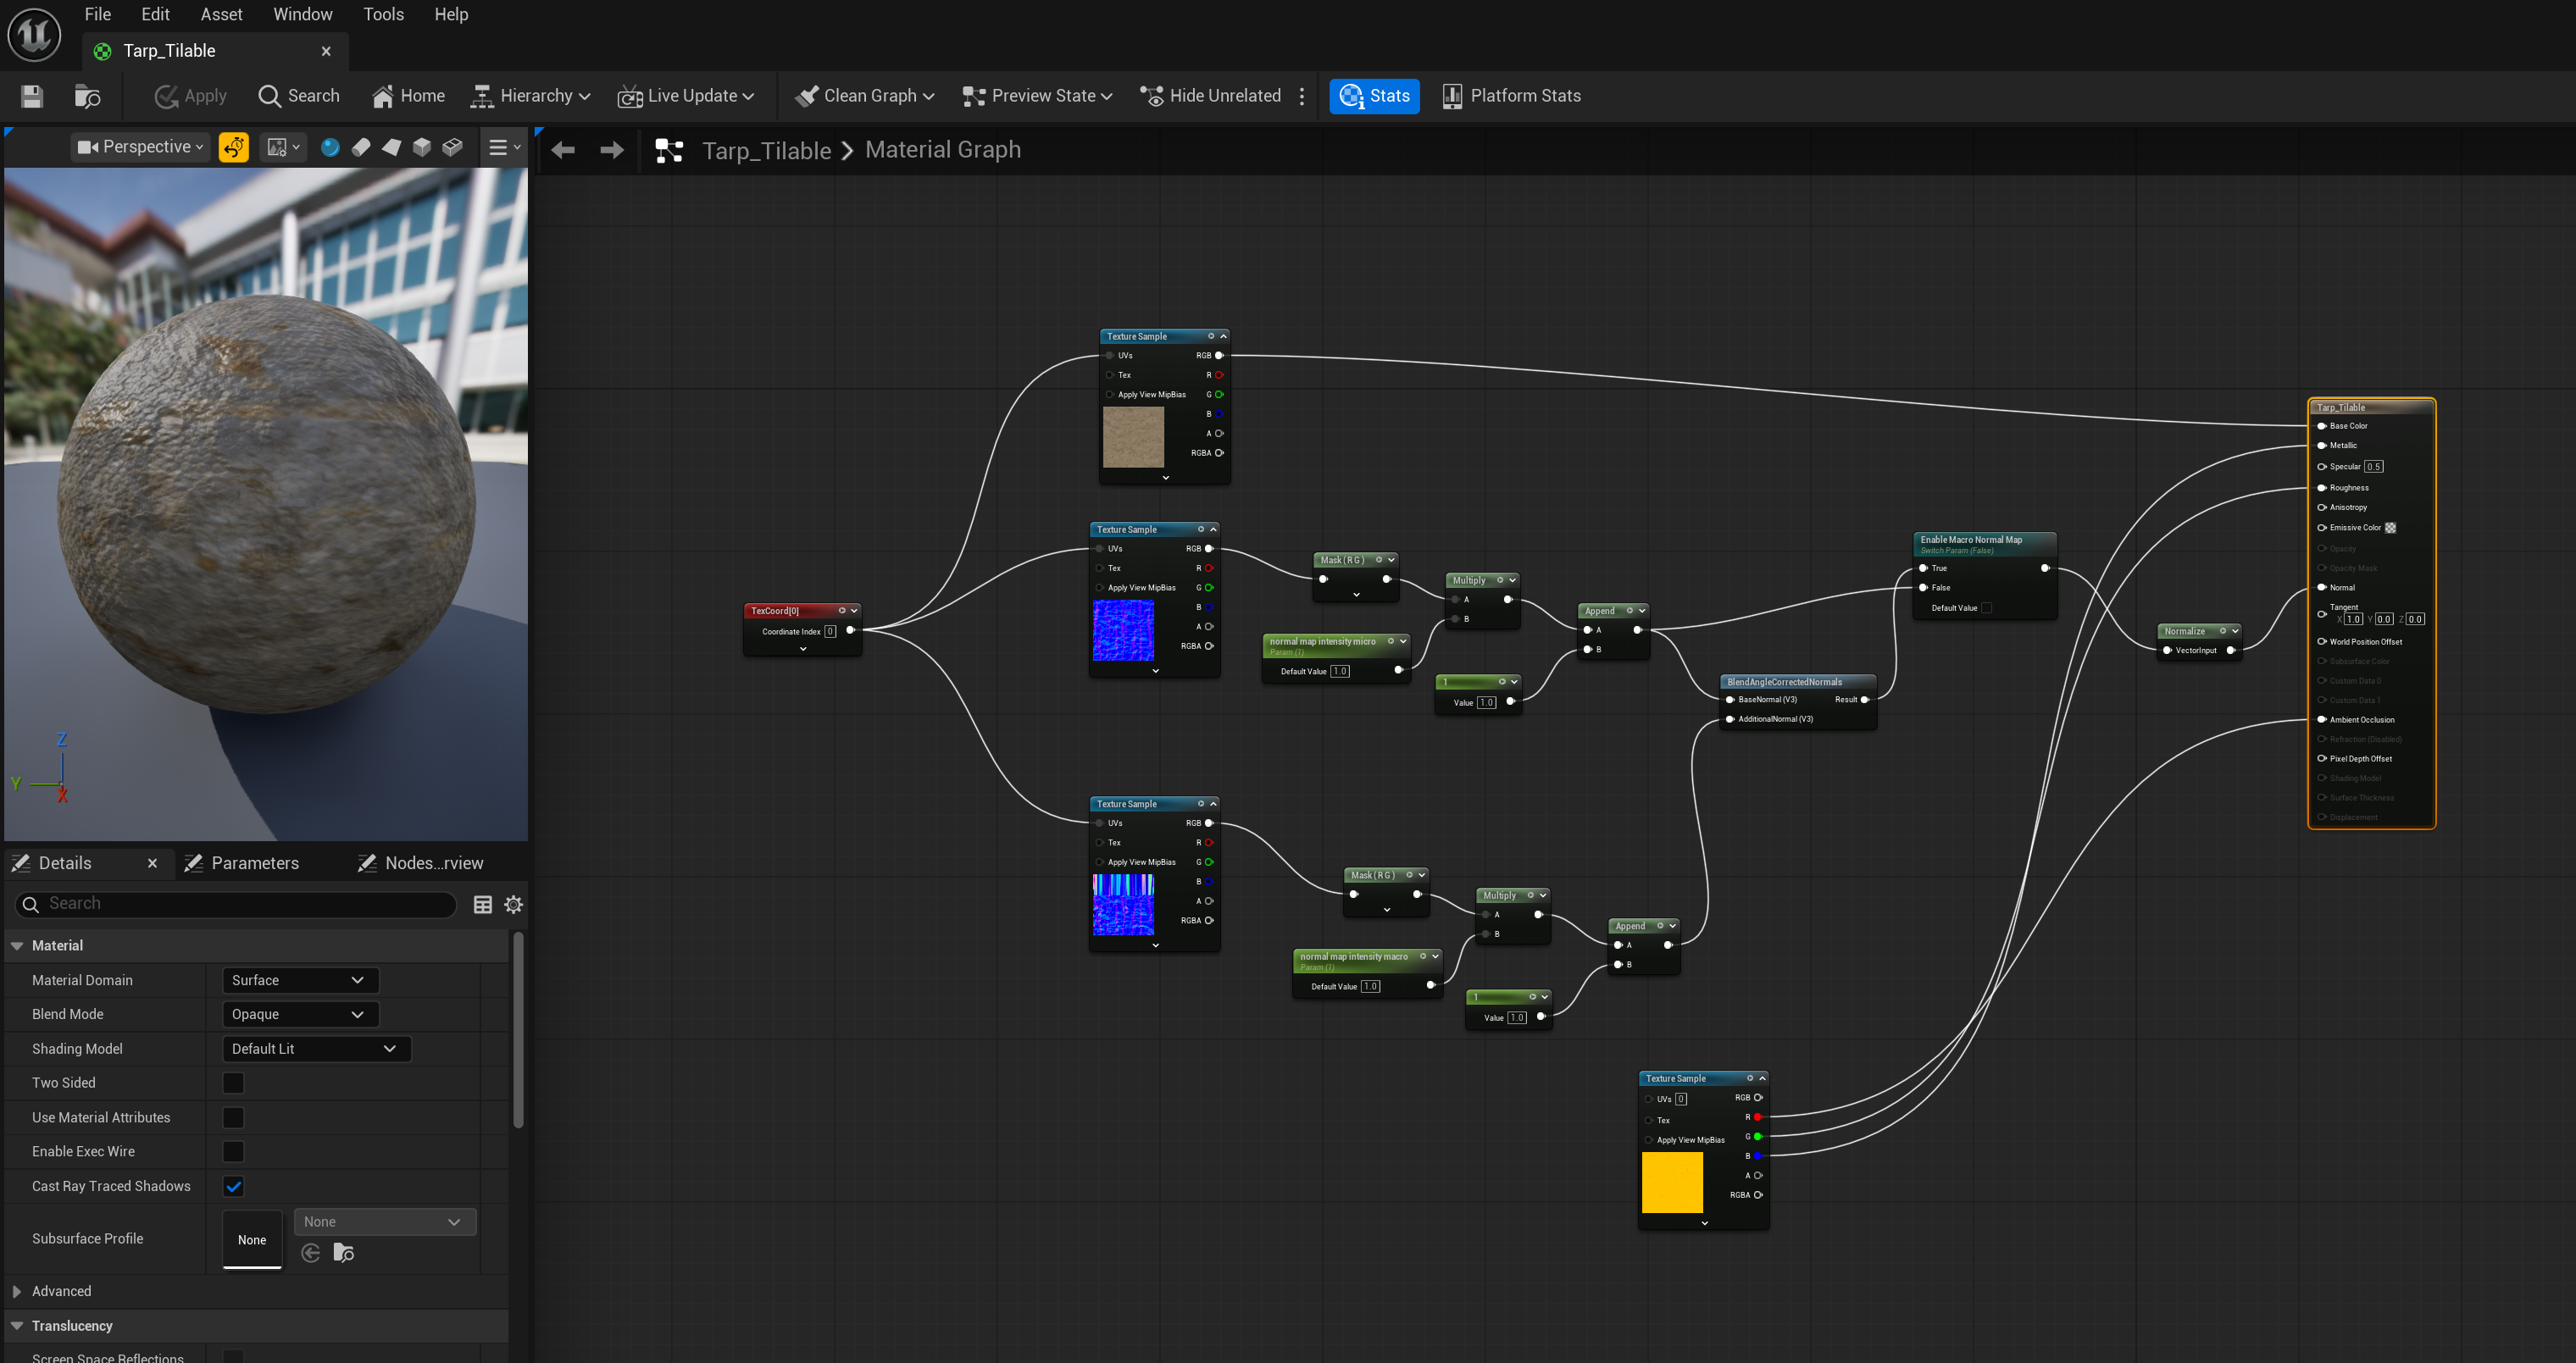
Below are some screenshots of the node networks I used to create my tillables. You will notice that in some materials there are 2 normal maps, the reason for this is that I borrowed the normal map from my unique baked assets I made previously. This way, I can have a bit more freedom to tweak the tillable for the asset itself.
- This is a deep dive for the blended normal method for the TARP, but the same logic applies for SAND and WOOD.
To achieve a high-fidelity look for the tarp, I built a hybrid shader that blends macro fold forms with micro-fabric grit using the BlendAngleCorrectedNormals (BACN) node to maintain lighting accuracy. I implemented custom math with Component Masks and Append nodes to allow for real-time intensity adjustments of both normal maps directly in the Material Instance. For professional-grade optimization, I utilized ARM packing (AO, Roughness, Metallic) into a single RGB texture and integrated a Static Switch to toggle the complex logic only where necessary. This technical architecture ensures the tarp looks like a heavy, weathered canvas while remaining performant enough for a modern AAA environment.
Note for the WOOD tilable, I can also change the color. And, I created a material instance in order to manipulate the roughness value so that the wood can look wet in my scene - as if it just got dragged from the outside to the inside.
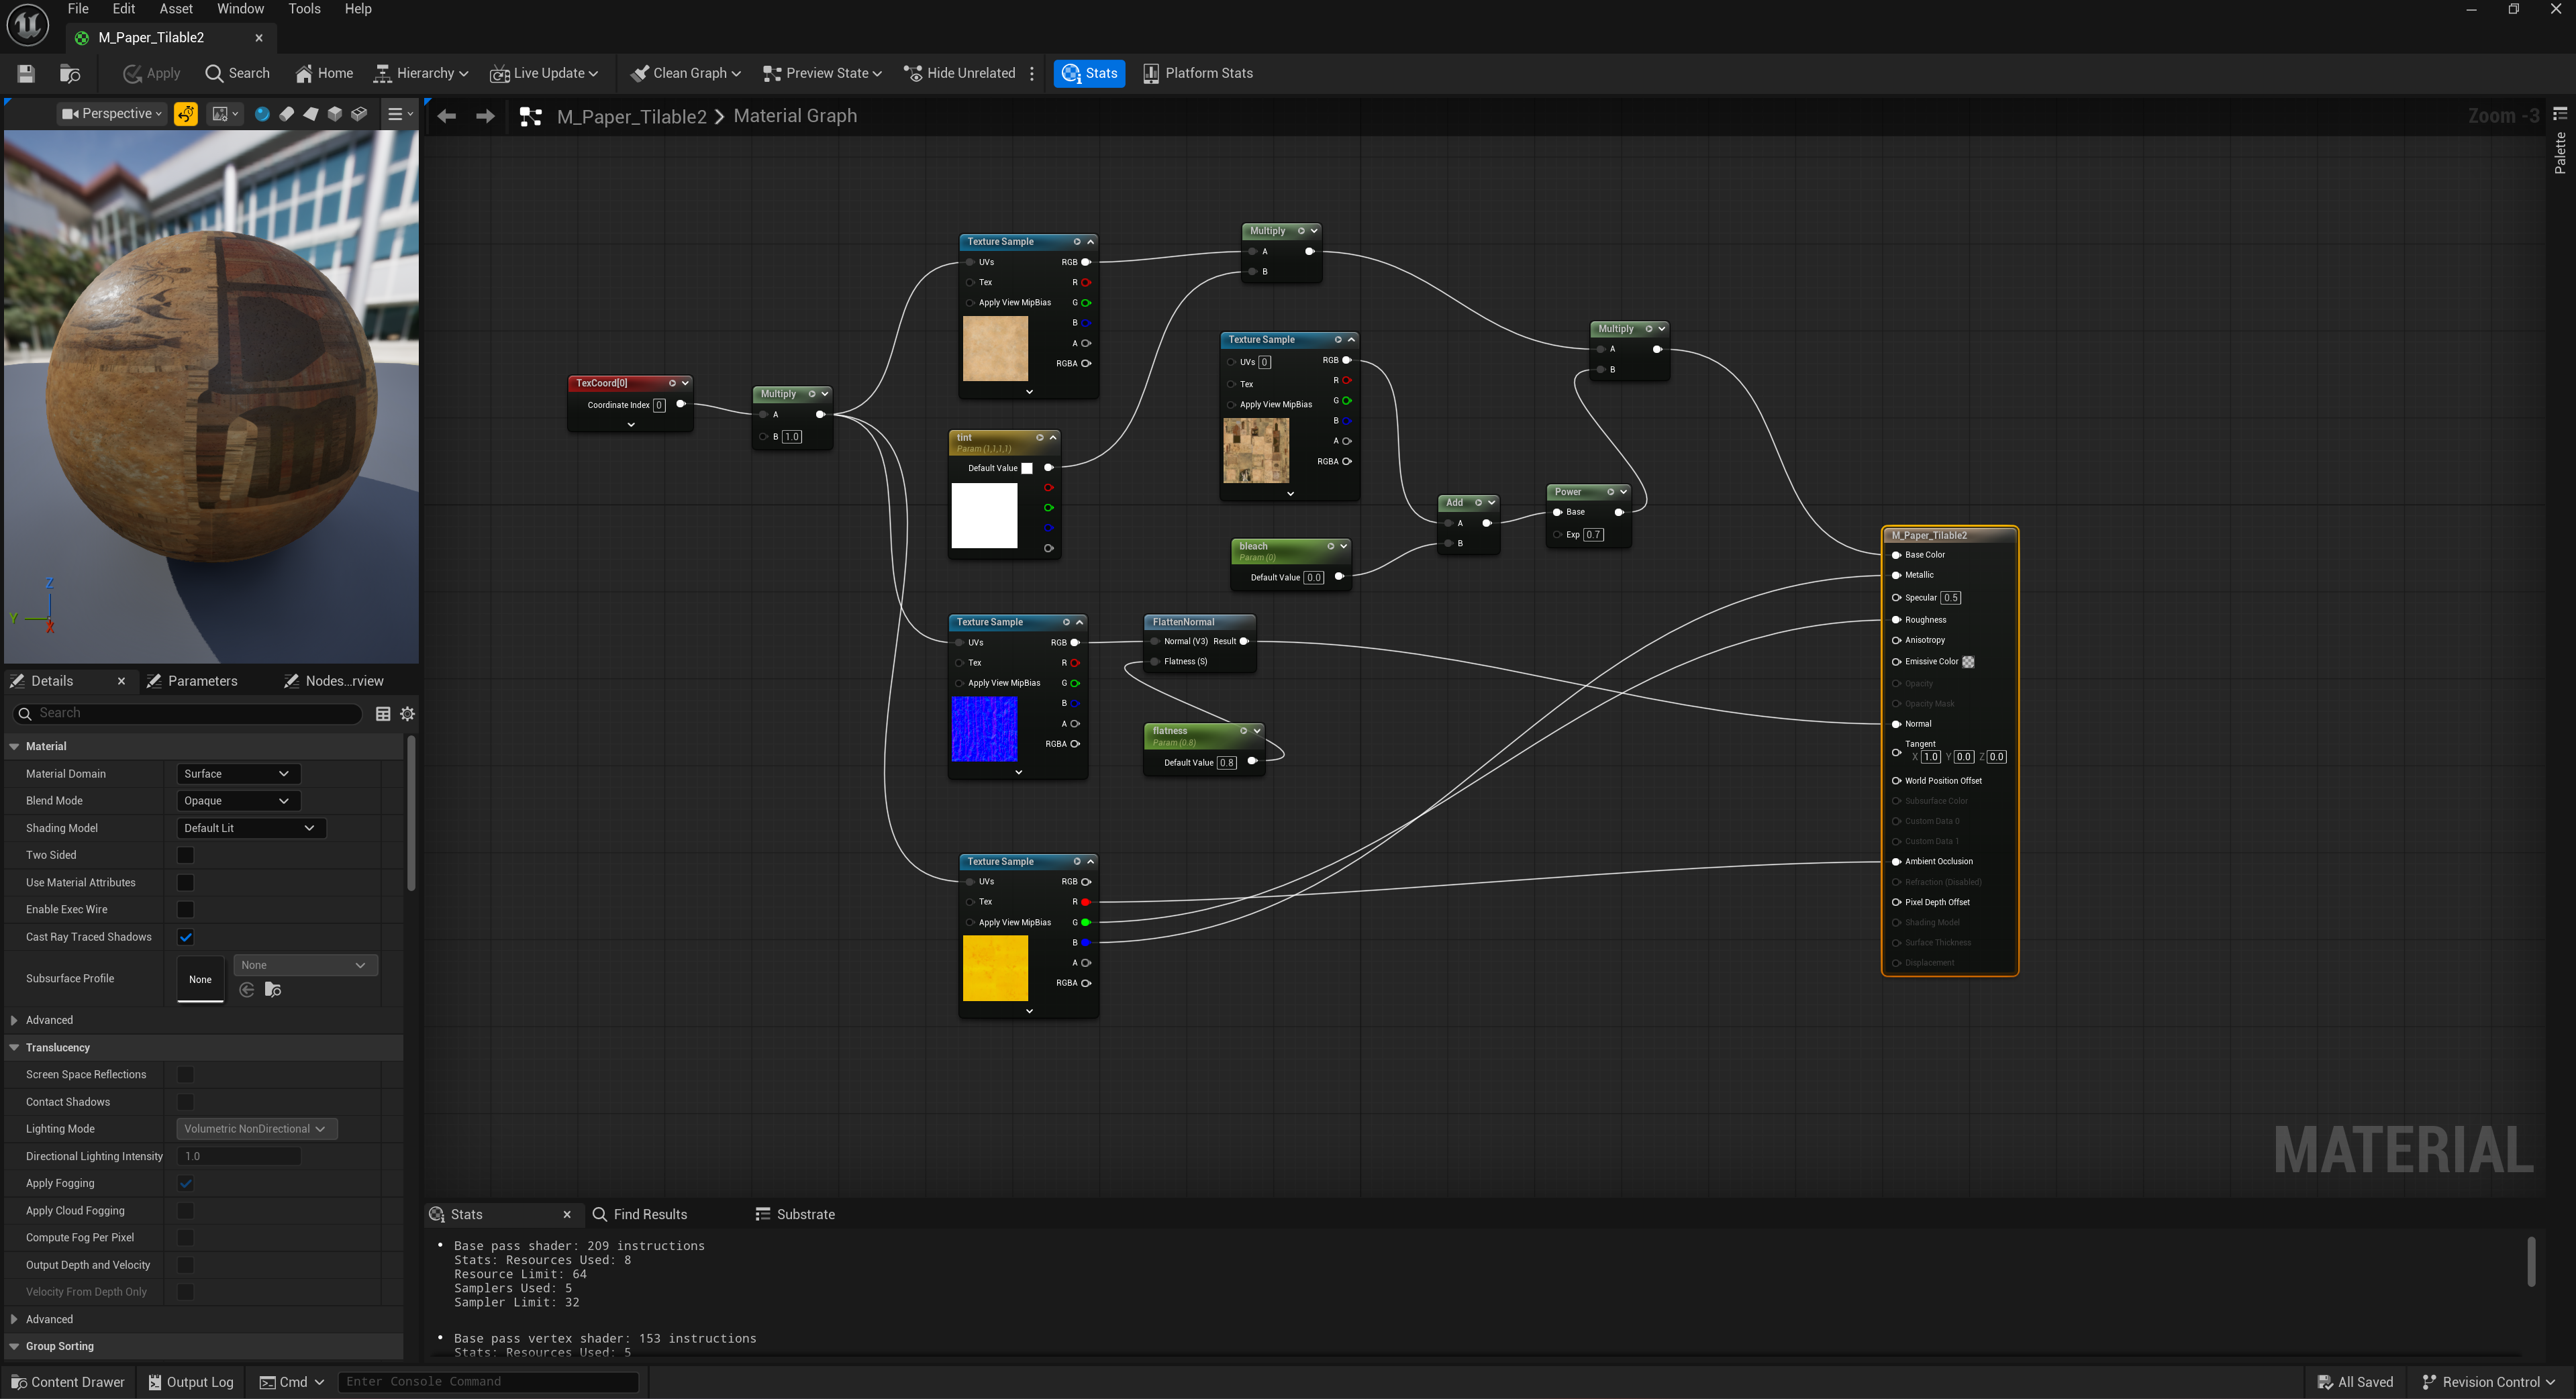
2. The blended PAPER method
For the paper tileable, I developed a hybrid shader that balances unique narrative detail with high-res material fidelity by using a unique bake for the base color to capture specific ink and text details. Since the ink is non-transparent, I overlaid this baked data on top of the high-density tiling paper base using a combination of Multiply, Add, and Power nodes. To add further flexibility, I integrated a Color parameter, allowing me to adjust the paper's age or staining directly in the material instance without needing additional textures. This setup ensures that the maps and scrolls have distinct, unique writing while the underlying paper fiber remains sharp through TexCoord scaling.
2. Lighting and Composition
The foreground area—specifically the pirate desk—is the "hero" of this environment.
- Foreground Relighting: I adjusted the lighting in the foreground to create a more dramatic focus on the desk props.
- Scene Cleanup: I performed a cleaning pass on the entire scene. I repositioned floating props, fixed the alignment of the floorboards, and cleaned up the rope placements. I also made the difficult but necessary call to delete unnecessary props that were cluttering the composition, ensuring the player’s eye is drawn to the most important narrative details.
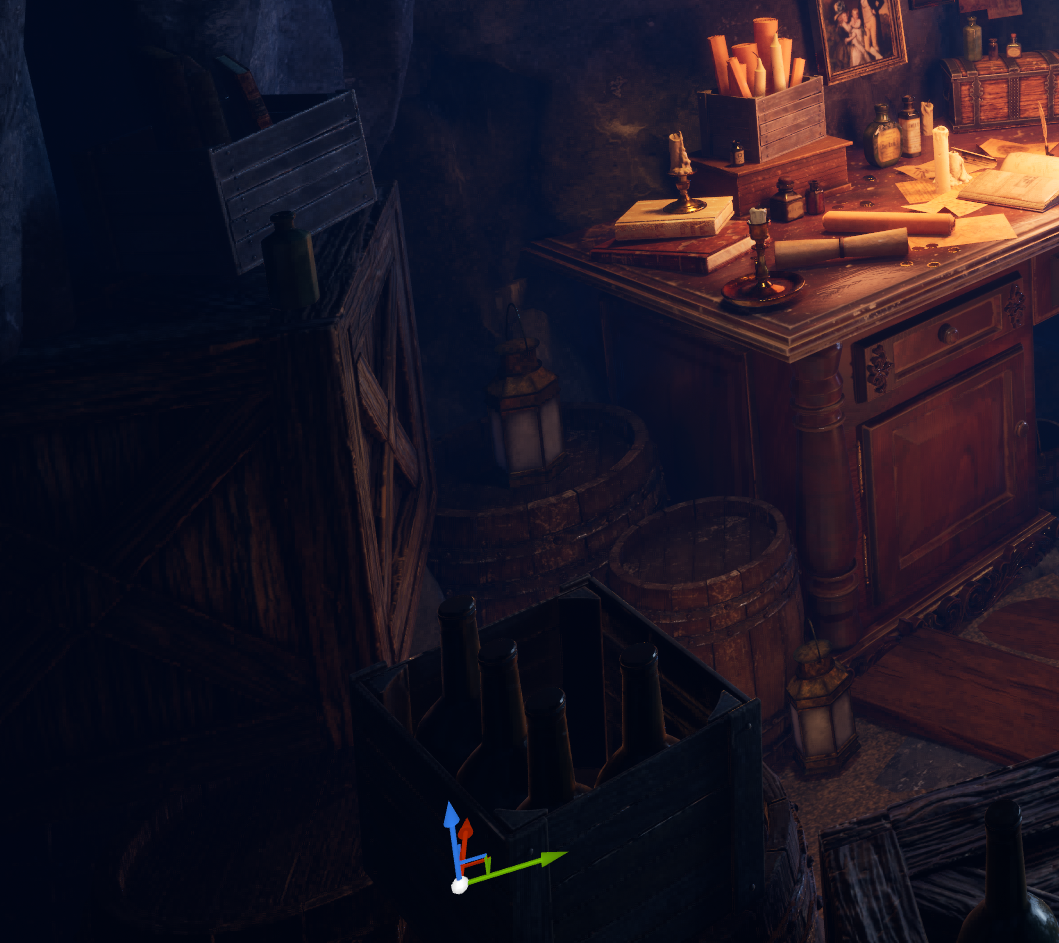
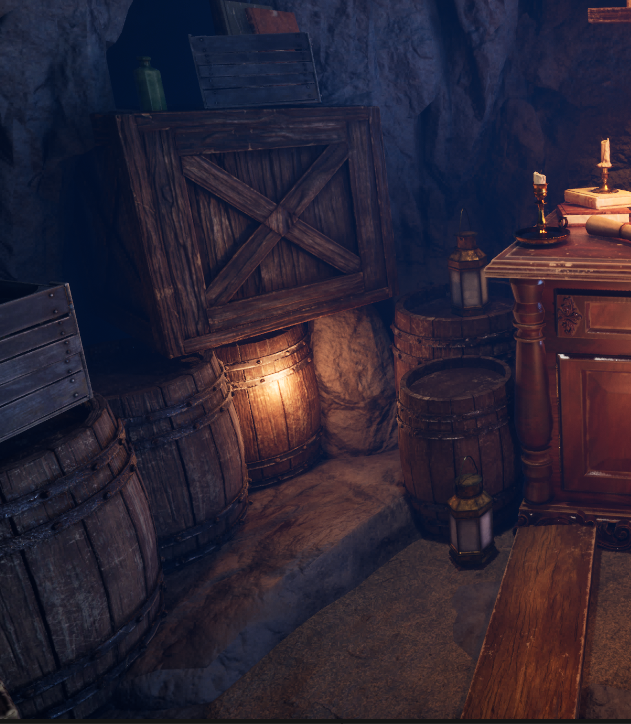
Notice, that there is a gentle falloff of the lighting from the crates to the barrels to the desk now. Before, the lighting was too harsh and when you turned the player around, you could see the point light. I had to lower the intensity of the light in order to get a better fall off effect.
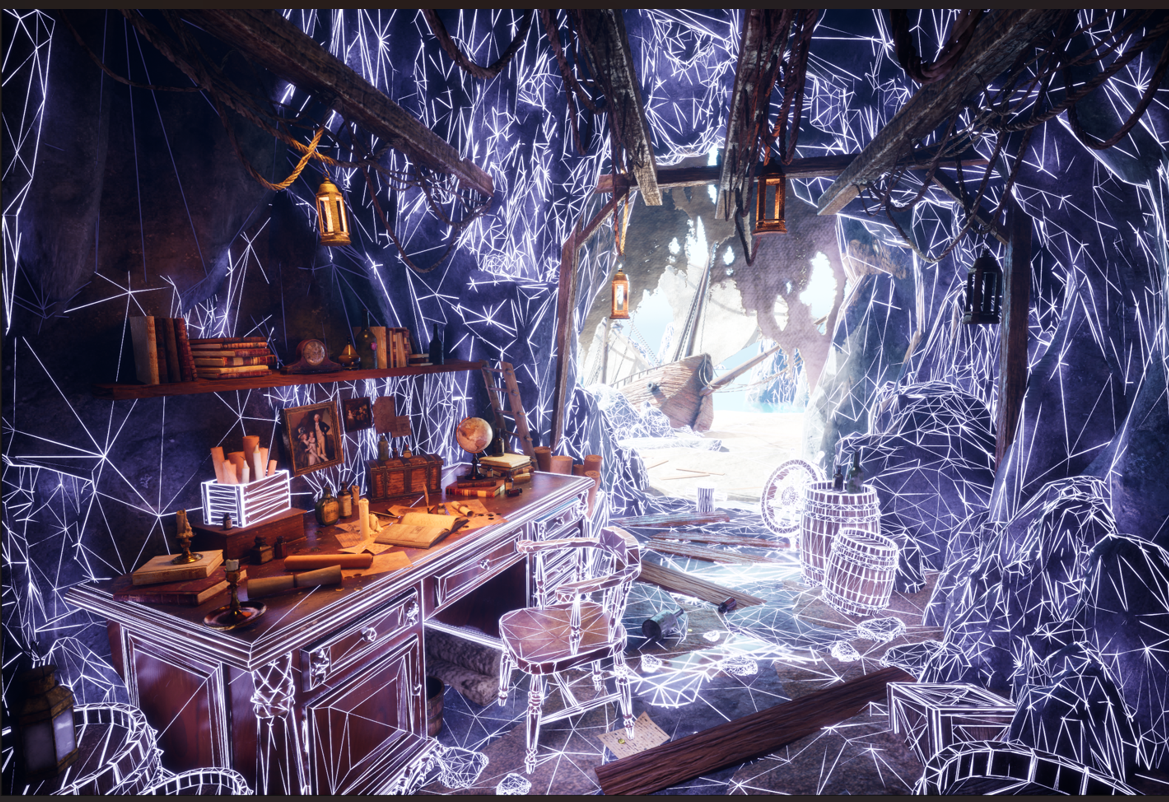
3. Technical Implementation & Walkthrough Setup
The environment is no longer just a static render; it is now a playable space.
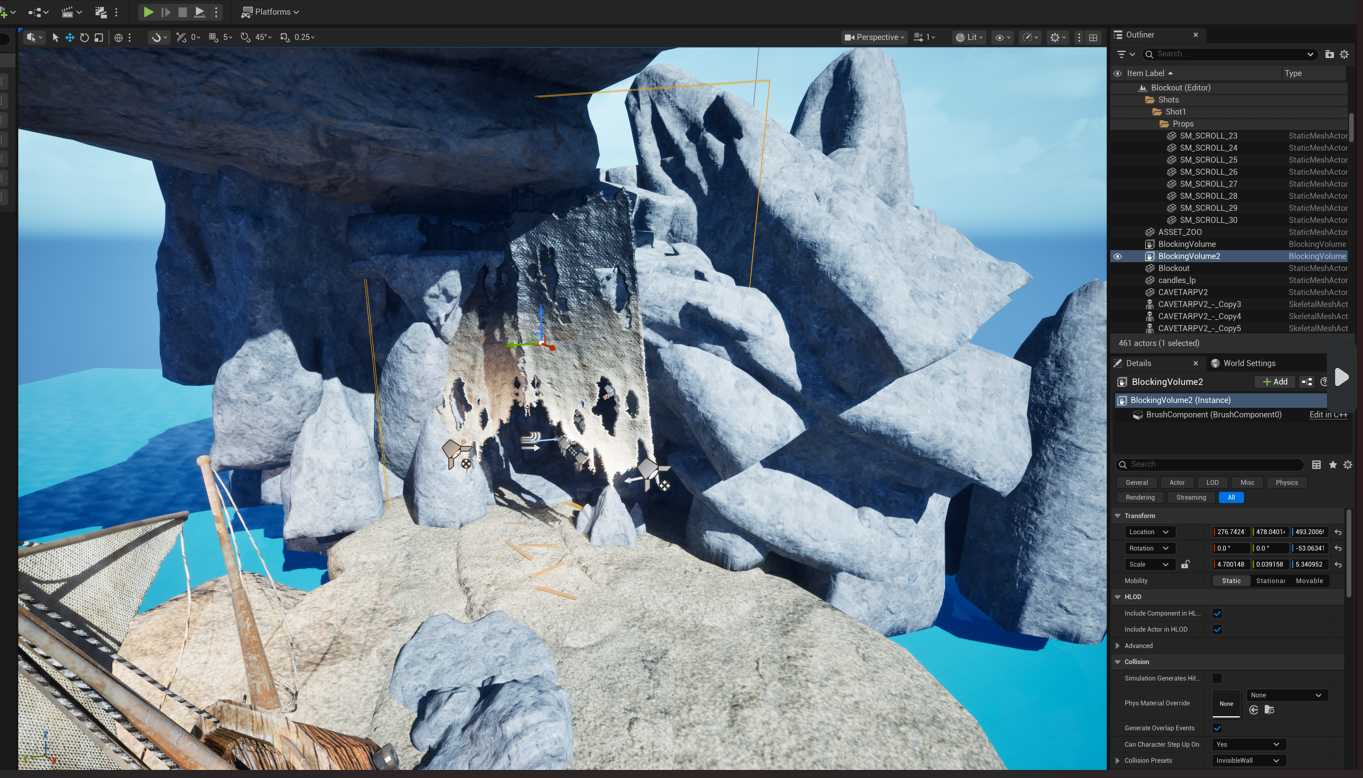
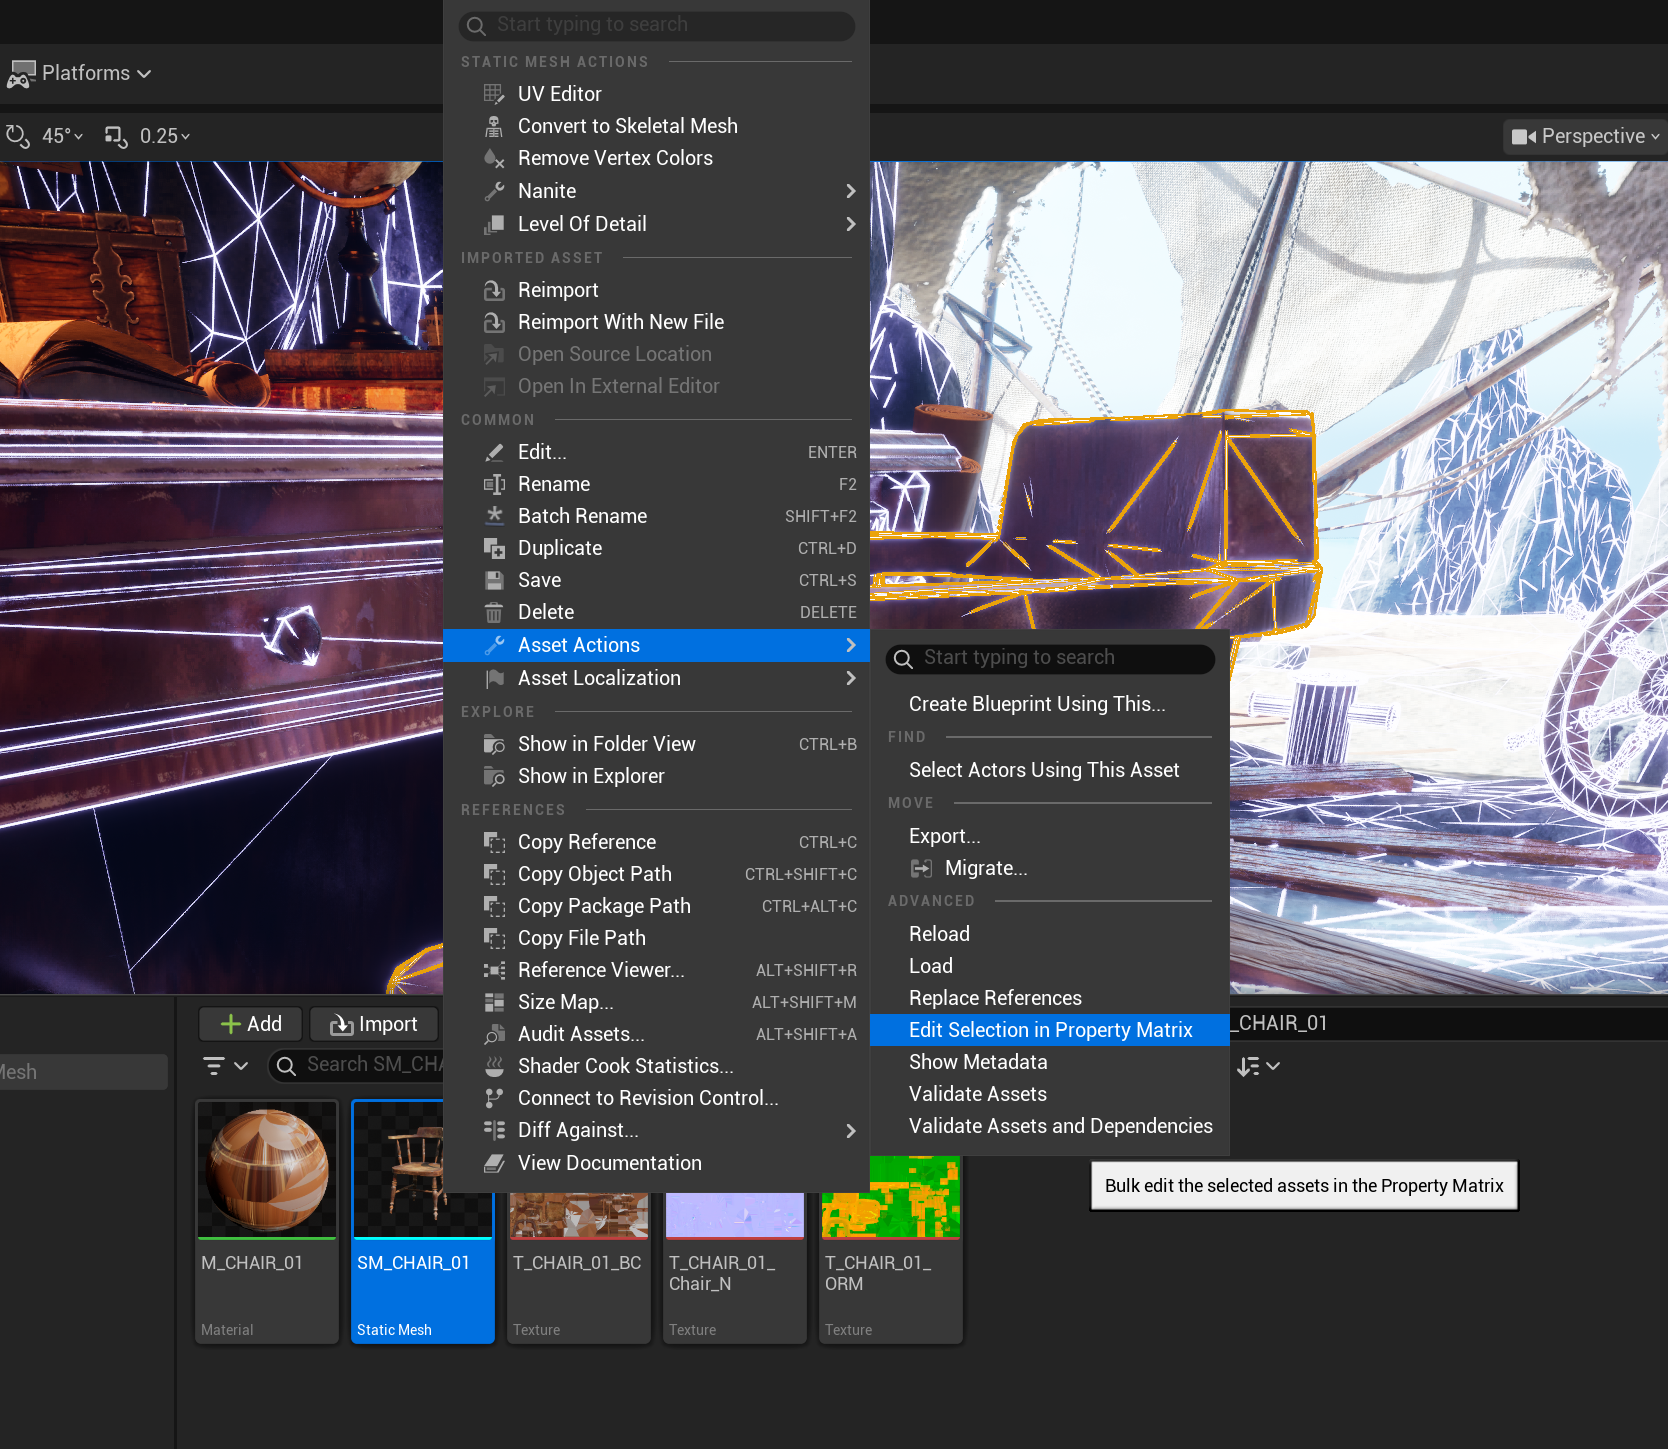
- Collisions: I added complex collisions to the rock walls and simple box collisions to the props. This ensures the player can’t walk through the desk or clip through the cave. I struggled immensely with this step and at one point tried a blueprint bounding box, but this did not work as the player kept falling through the scene. A method that did work is shown below in the screenshots.
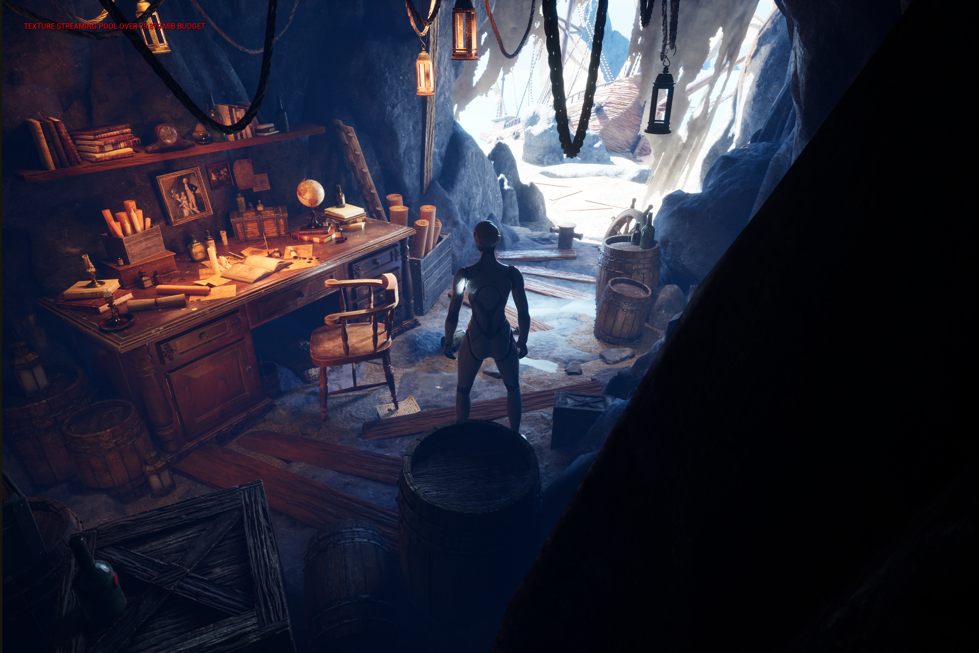
- Third-Person Integration: I successfully integrated a player character into the scene. This was a major milestone, as it allowed me to test the scale of the cave and ensure the "Physical Size" of my textures feels correct from a player's perspective.
Note: I only want the player to stay inside my cave so, I added a blocking volume collision in front of my cave so that it is sealed off. This way they can view the shipwreck from afar. This is strategic, because I used a lot of grouping of the rocks outside the cave for the composition, it is not meant to be explored as it is an interior environment.

Leave a comment
Log in with itch.io to leave a comment.